I have been dragging my feet on this blog post, all because I was disappointed with my photos. But considering I took a full day yarn dying workshop and tried my hand at dyeing yarn for the very first time, it seemed a shamed to not share the experience because of less-than-great photos. So here we go, my first time dyeing yarn!
I’m on the newsletter list for pretty much every yarn store in Toronto, and I’ve been waiting for one of them to offer a yarn dyeing workshop. It’s tough, not many shops have the set up to do this, as you need regular access to running water, and a high-powered hotplate or oven to set the dye. And space for the yarn to drip dry, too! But The Knit Cafe recently had a yarn dyeing workshop, and I was fast enough to snag a spot.
This was the set up:
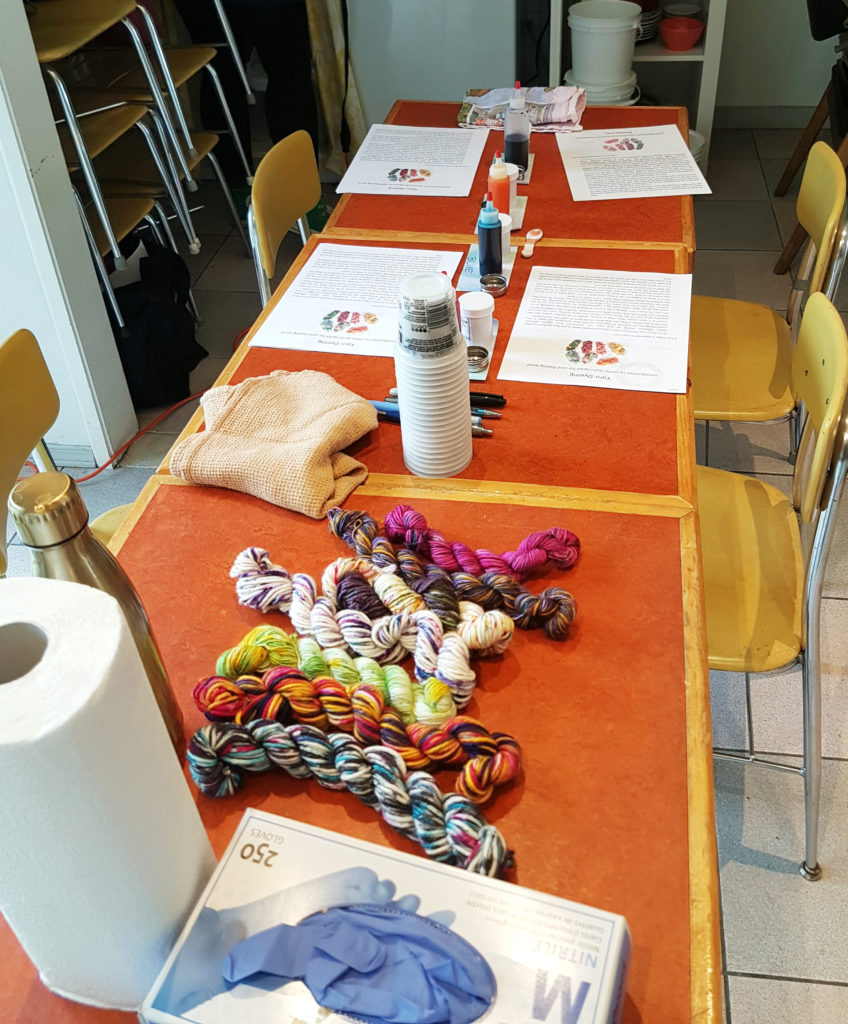
It was a small workshop for only 4 students, and there really wouldn’t have been room for anyone else. We dyed on natural skeins of Cascade Eco, a bulky weight yarn that I love knitting with, but I suspect is actually pretty hard to dye. It’s a two-ply wool that has quite a lot of halo (meaning, it’s pretty fuzzy) so some dye techniques seems less defined than I would like, such as when we tried speckling. but we will get to that!
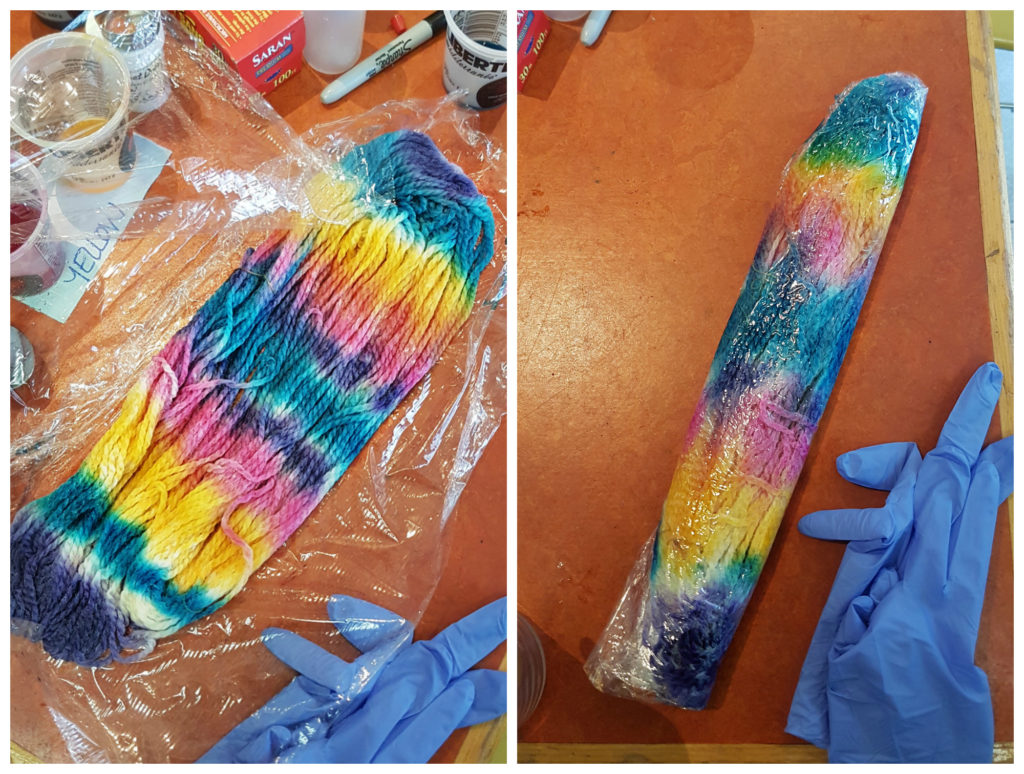
We tried our hand at mixing dyes, talked about the proportions of dye and water and the effects, and how to space colours. This was my first attempt, and I was trying for a rainbow effect:
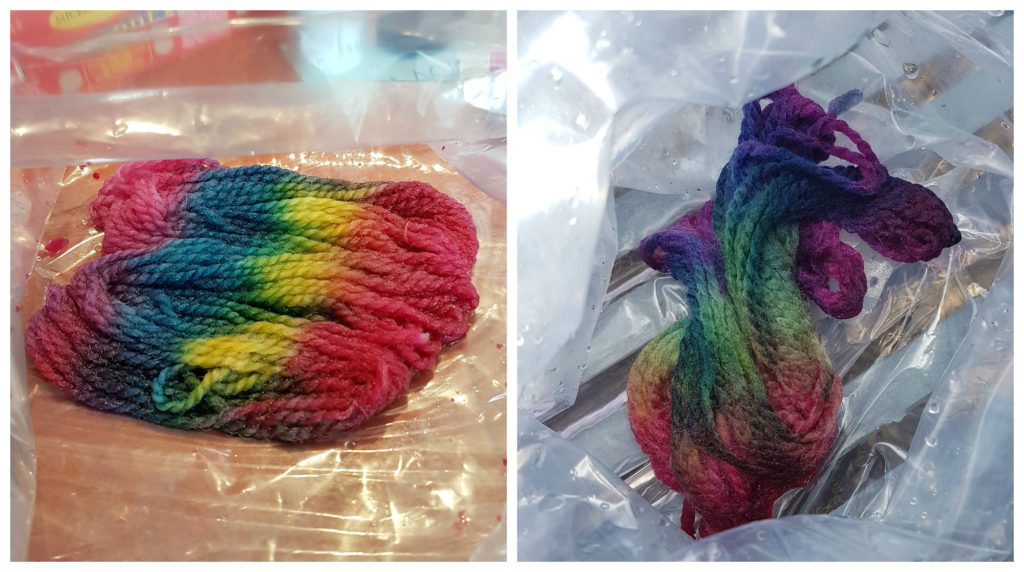
The image on the left is before the dye was set. The method we used was to wrap the yarn in plastic wrap, and then put into heavy, freezer-style ziploc bags, and then put the bags in the pot of boiling water (on the hot plate) to set. The dye tends to move around a lot through this process, so my bright bands of yellow on the left became more of a bright yellowy green after the setting process. I learned to leave more space between colours the next time:
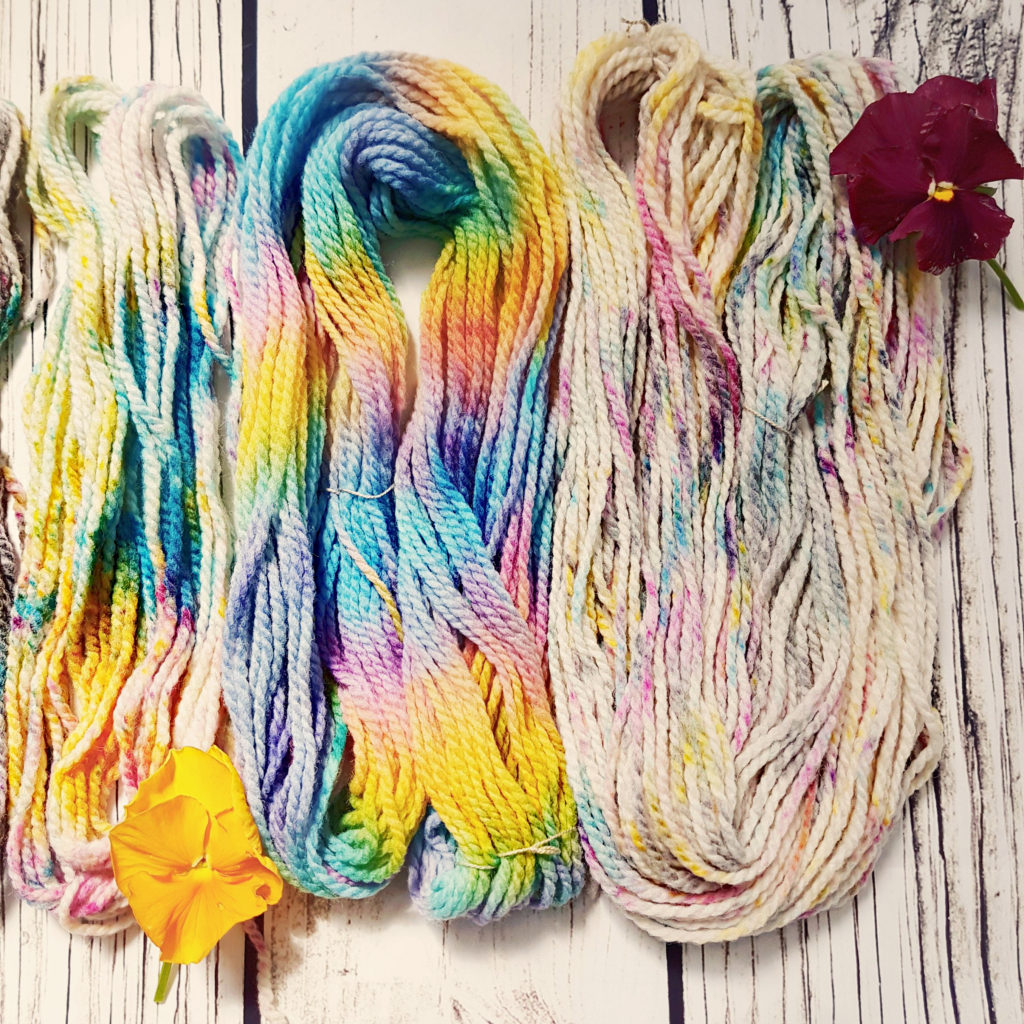
Here is an attempt at speckling, before being cooked:
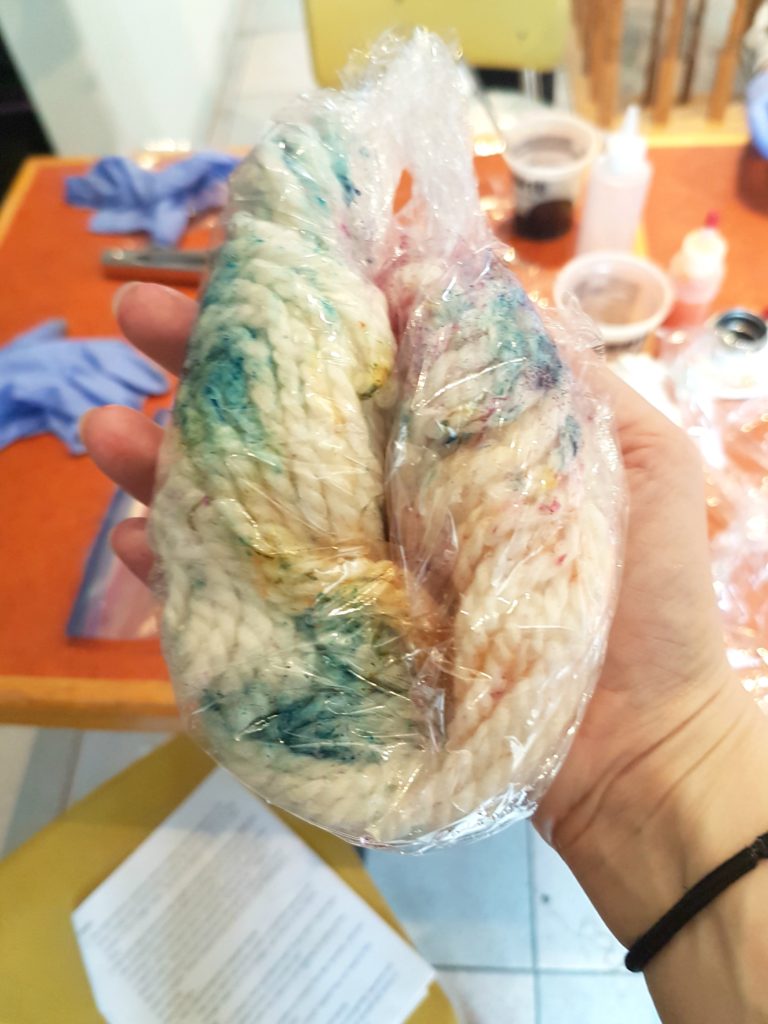
I applied the barest specs of dye, or so I thought. The yarn was likely a bit too wet for the dye to stay put, so you can see how it is already getting a little more of a watercolour look, than crisp speckles. It’s easier to talk about it when you can see them all at once.
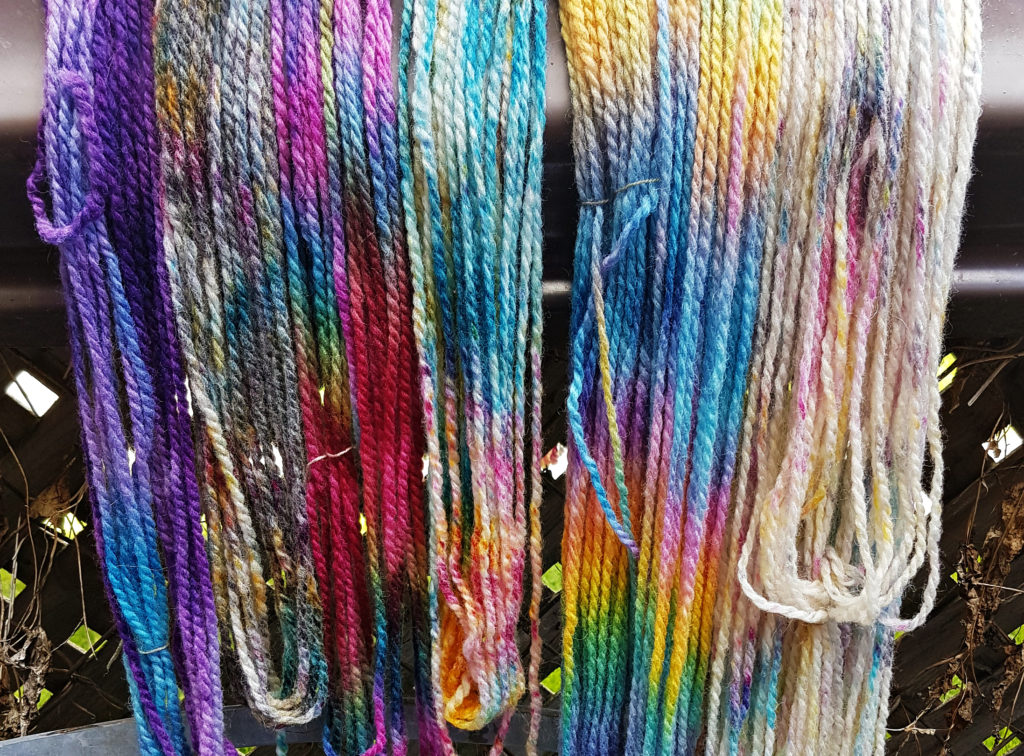
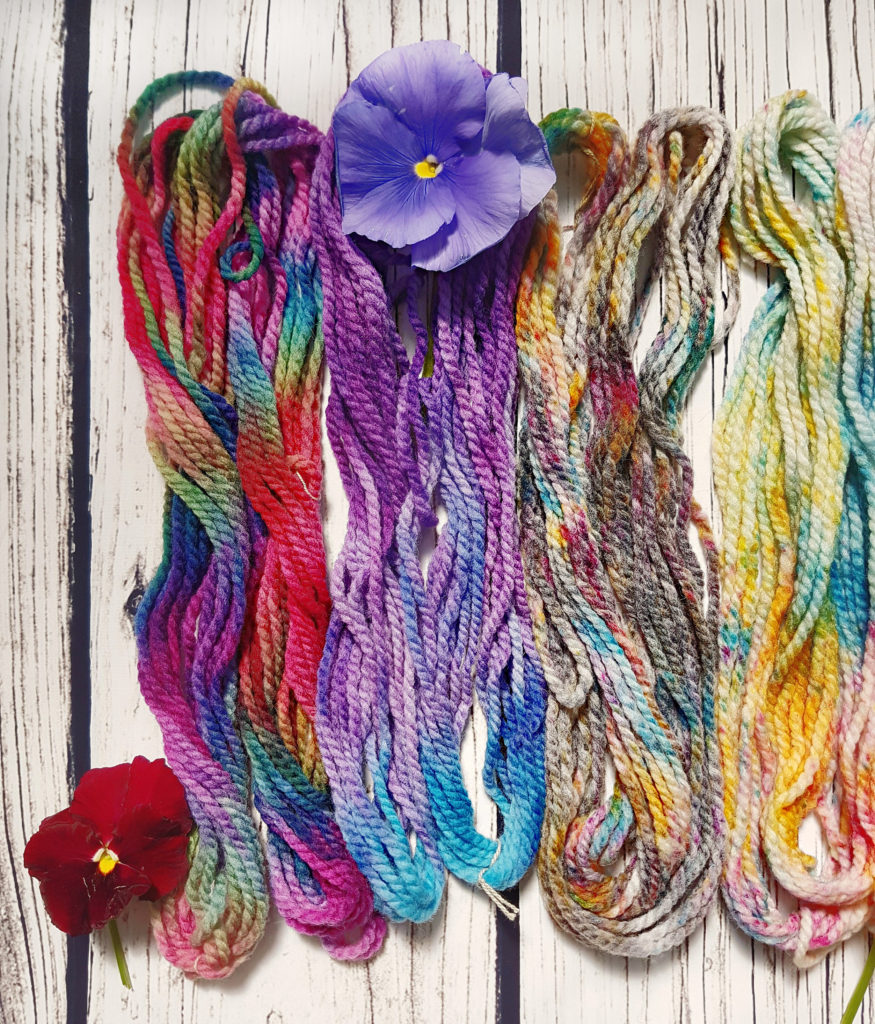
The yarn is in sequence from left to right, the far left skein begin the skein I tried first and the far right the final skein. Doing a technique of pouring over dye is definitely a satisfying way to dye that feels like it turns out almost every time. The second from the left skein was my attempt at making something with a variegation of purples and blues, and while the blues don’t have much range, the purple does. Then I tried to do a speckled skein with black speckles, but it’s pretty much mostly dark grey with some rainbow bits in it. So then I tried to do some speckles with no black dye, and I think it looks rather pretty (3rd from the right).

These photos, blegh. It was too sunny when I took them, so they are bleached out in places. But if I try to edit the contrast down, they look grey and dark. Oh well. Can’t win ’em all.
Those were our ‘mini skein’ tests, which were about 30 grams each, and then we dyed our final two skeins, which were 60 grams each (the two skeins on the far right). I decided to do a lighter, unicorn colourway, thinking it would be something Lila would like – maybe I’ll make her a hat and some mittens in the winter? I’m really happy with how it turned out. Then I took my final run at trying for a speckled skein, and managed to use only the tiniest amount of black dye with the other colours. While I think it looks pretty good, I can safely say that trying for a speckled effect on a really sheepy bulky weight yarn is probably not going to yield those crisp results you see when the same techniques are done on superwash merino yarn.
I really enjoyed the workshop – I have dyes at at home and a box of undyed yarn, and have been meaning to try dyeing yarn for probably a couple of years now. But it all seemed so daunting, especially with the huge range of advice and the general insistence that you need separate pots for dyeing yarn than for cooking. I have a small kitchen and no storage, so that never seemed like an option for me. What I loved about the workshop was seeing the ziploc bag technique, which meant that there was never any dye in the pot, so the pot was otherwise perfectly fine.
Due to my finger injury, I haven’t had a chance to swatch up some of these little skeins and see how they look, but I’m pleased to report that my fracture has healed, and I’m back to knitting! Now to finish those sweaters….