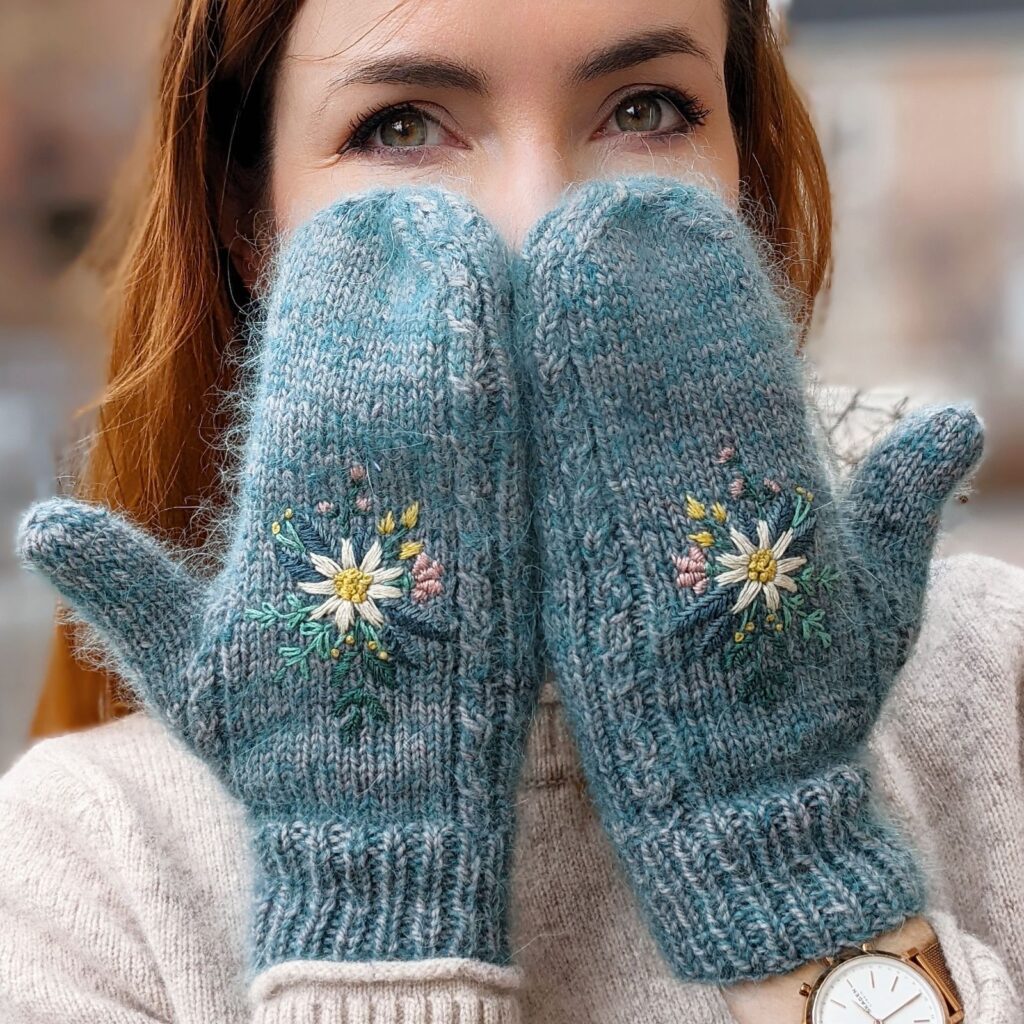
Framework Mittens
I designed the Framework Mittens to be an ideal landscape for embroidering on knitwear. I wanted the lines to run up the sides on the front of each mitten to act as a sort of ‘handrail’ for positioning the design, so that you wouldn’t end up with it too far to the left or to the right! You don’t have to embroider them, but they make a great mitten for embroidering, if you’re going to try it.
Step 1: Download the pdf knitting pattern HERE
Step 2: Download the embroidery stitch guide HERE
To download a copy of the pattern to Ravelry, check the Ravelry coupon code in your kit.
You can embroider on a knit made from any type of yarn! If the yarn has longer fibres that give it a ‘halo’ (think alpaca, mohair, etc.) or another type of texture, you will want to ‘baste’ the stick and stitch design onto the knit. Here’s a photo to show what I mean (and there’s a video down in the Removing the Stabilizer section for a lot more detail):
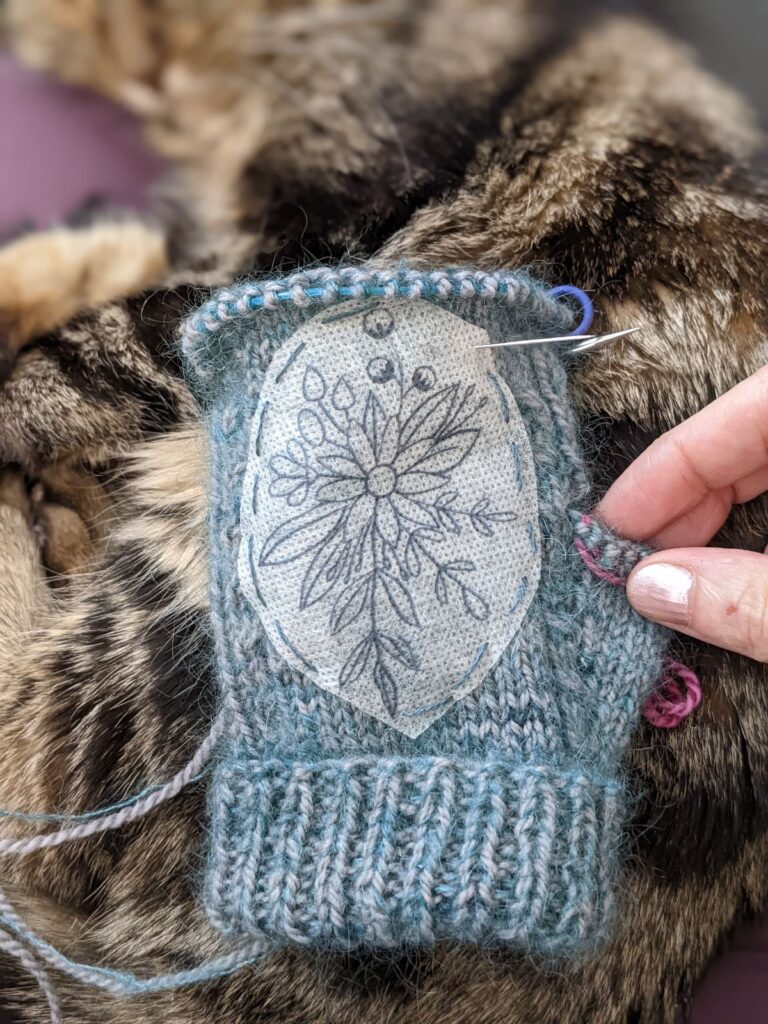
See those dashed stitches running along the edges of the stick and stitch design? Those are the basting stitches, and will help keep the sticker in one place when work with fuzzier yarns.
Those stitches that are running around the outer edge of the stich and stitch dissolving stabilizer will help keep your stick and stitch design in place, and not ‘float’ above your knitting and wiggle around on fluffier yarns. Just make sure to remember to remove them when you are done! it’s easiest to remove the basting stitches when you are finished embroidering AND knitting the mitten, but before you wash away the stabilizer. But it’s not impossible to remove the basting stitches from the mitten if you forgot and only remembered about the basting stitches after you washed and blocked your mitten. Just be careful when snipping and removing the thread. It should still come out without too much trouble.
When to Stitch on Your Mitt
The photo above (that shows the basting stitches) is also a really good look at when it’s a good time to stitch on the mitt. You’ll see that past the thumb gusset by about 1.5 inches is ideal, and I recommend folding up the cuff as well. This way, you can more easily move the needle for stitching and you will have your other hand (the hand not moving the embroidery needle) with your fingers inside to help keep the fabric of the back of mitt away from the front of the mitt. You don’t want to stitch the two parts together and not be able to get your hand in there, right?
Embroidering the Floral Design
For a guide to working different types of embroidery stitches, check out the resource page here (scroll past the kit videos!) And if this is your first time and you feel nervous about it, you can also trace the design onto a scrap of fabric and practice (with different thread, you won’t have enough in the kit to stitch it all twice) on that to get a feel for it. Don’t worry about perfection- embroidered stitches are actually quite forgiving on knits.
Stitching Order
When embroidering, it’s best to stitch details of the design from the background to the foreground. So, start with the background leaves- the dark green branch, the blue satin stitch leaves, the light green branch. then the stems of the buds and flowers. It doesn’t matter which flowers you stitch in which order after that, except the daisy, because it has two parts to it- stitch the petals of the daisy first then the french knots in the center. French knot scan be tricky- if you you don’t like how it turned out, you can cut it off the surface of the stabilizer and try again!
Removing the Stabilizer
Remove any basting stitches you put on the stabilizer to keep it in place while you stitch. Here is a quick video to show how I do it:
To dissolve the stabilizer, you are going to wash it away. Fill a sink with lots of warm (not hot!) water. You can use a bit of laundry soap or wool wash in the water if you want, but it’s not necessary- water alone will do the trick. Completely submerge your mittens, and let them soak in the warm water for about 5 minutes. This is a great time to go make a cup of tea, or have a quick snack. Then you can come back, and check on them- you’ll see the stabilizer is all weird and pasty looking, and dissolving into bits. Swish the mittens around in the water, and gently rub with your finger at any spots that are still clinging to the mittens. Then drain the water away, gently pat with a towel to remove excess water, and wet block as desired.
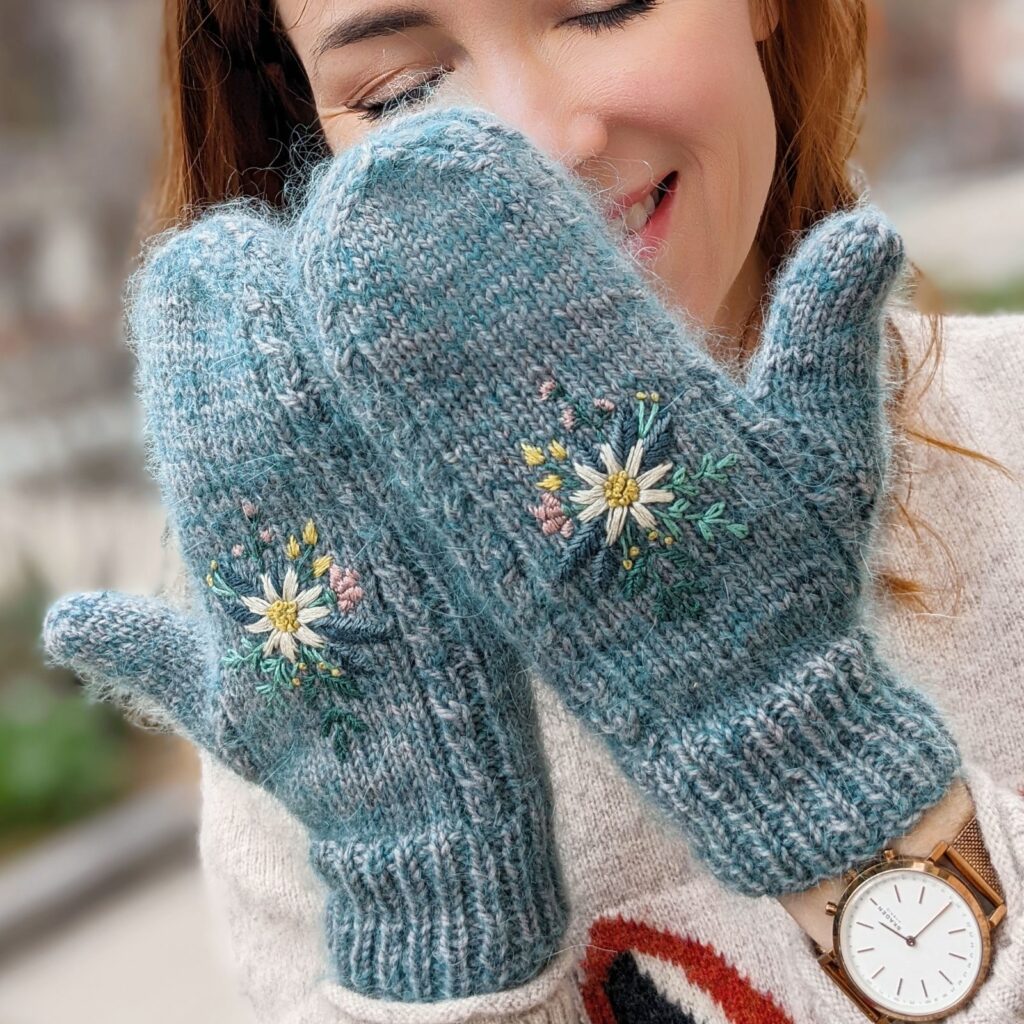
And now I am so excited for you, because once those mittens are dry you are going to LOVE them so much! Did the stitches turn out a little wonky in some places? Won’t matter, because the overall effect is beautiful, and your are going to get so many compliments on these! Enjoy your mittens.