The Wooliest Season
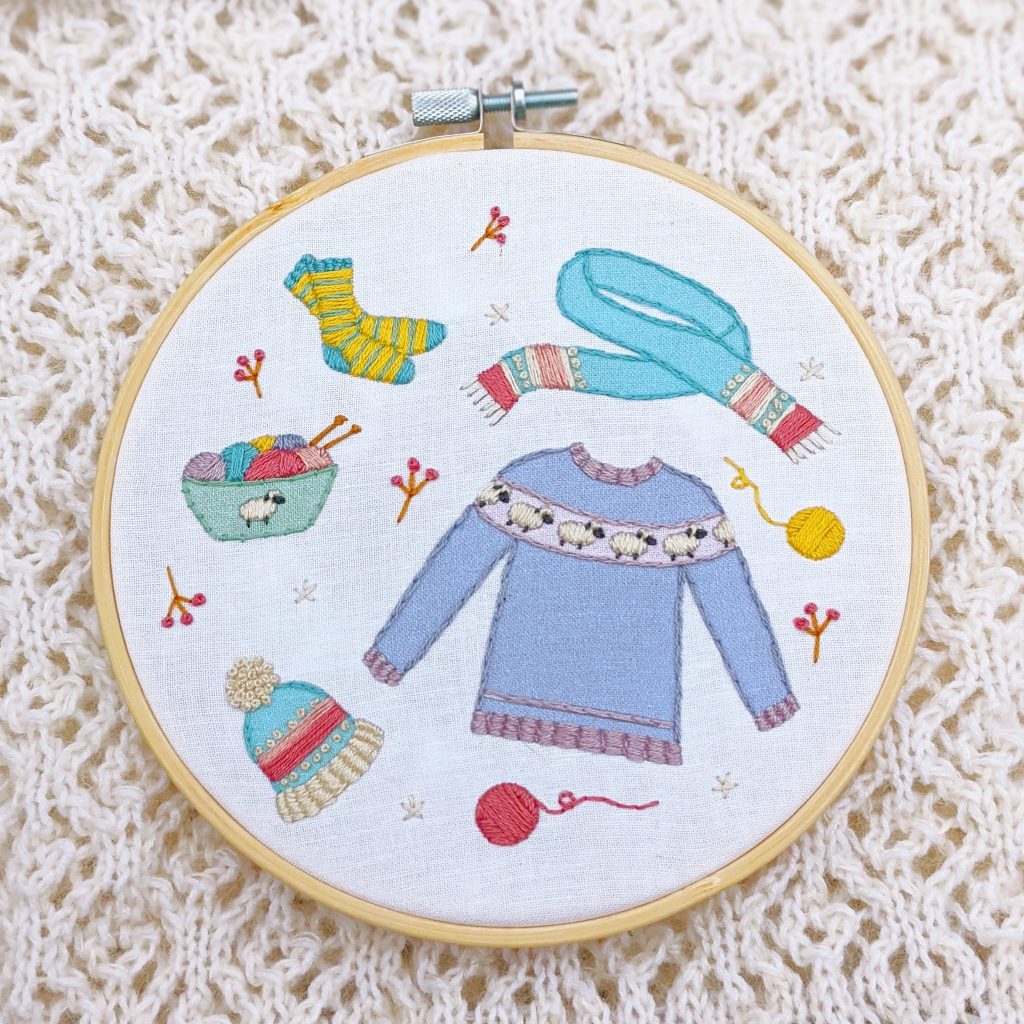
Stitching order for the overall design doesn’t matter too much, but it does for the individual items in the design that have multiple parts- like the sweater or the bowl of yarn. Read on for suggested stitch orders and more details!
A Note on the Sheep
Some of you may want to do French knots on the sheep instead of satin stitch- totally up to you! I tried both but found I liked the look of the sheep a bit more in the satin stitch, and felt more consistent with the rest of the sweater. You could always try the french knots and see if you like it, and snip them out if they don’t work for you- but keep in mind if you try that you may need to purchase additional thread in that colour to complete the design (which can be readily found at most craft stores or other shops that stock DMC embroidery thread).
Berry Sprigs & Twigs
I recommend stitching the twigs first and then working your french knot berries (3 wraps for each french knot), but the most important detail of these is to cut the thread when moving between the berry sprigs. don’t let long trails of thread crisscross all around the back of the fabric. Not only could it possibly be visible through the fabric on the right side, but it is will quite possibly cause puckering in the fabric, or other uneven tension and ripples.
Yarn Bowl & Yarn
Stitching order – I recommend stitching the yarn balls in the green bowl/basket before stitching the edges of the yarn bowl. It will be MUCH easier to keep the edge of the yarn bowl looking clean if the yarn balls are finished first. For the colours used in the yarn balls (which are all worked in satin stitch), it was getting a little crowded on the instruction sheet and it looked like it would be easy to tell, but here is a close up of the basket of of yarn so we can work through the details:
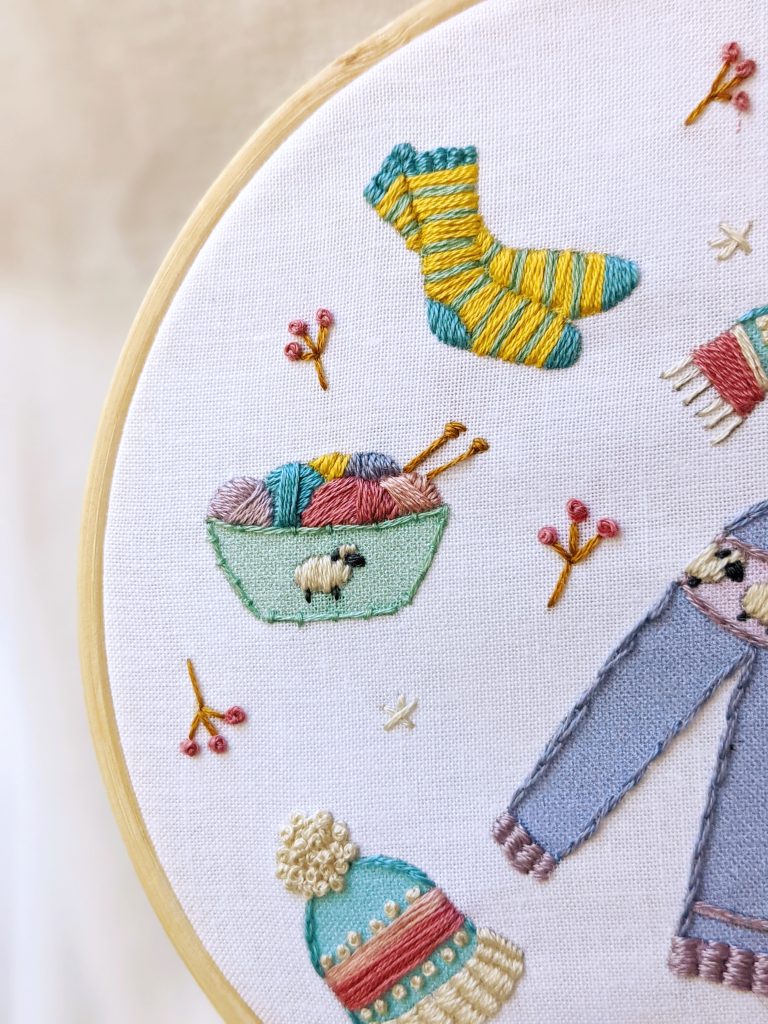
Bottom row of yarn balls, from left to right: (and remember, we’re always stitching with 2 of the 6 strands of floss!) #3042, #807, #223, #224. Top row of yarn balls: #3821 on the left and #160 on the right.
For the basket, it is worked with couching stitch (see stitch guide on resources). You will stitch 4 big straight stitches along each side of the yarn bowl- top, bottom, left side, right side. They will not all perfectly match up with where they should be according to the pre-printed design, and that’s okay- that’s where the couching will come in. As you work the short stitches over top the longer stitches, you’ll push the thread into place so that it mimics the curves as printed on the fabric.
The needles are straight stitch, big ones for the vertical lines, and then two tiny horizontal ones at the top for the ends of the needles. They are worked in DMC colour #3829.
Scarf
On the printed instructions included with the kit, the white colour is missing from the stripes! Sorry about that, it will be corrected in the next printing.
Recommended stitching order: stripes, french knots, fringe, then outline stitch. Stitch the white stripes the same as the dark and light ink stripes- satin stitch, but in DMC #822. The french knots are 2 wraps each, to keep them a bit smaller and not overwhelm the scale of the scarf. Don’t forget that the little scarf fringe is also worked in #822, with small straight stitches. Outline is worked in split stitch (#807).
Hat
Sweater
For instructions on how to finish your stitched piece in the hoop, please see the second video on the resources page, here.
If you feel like you have more questions about stitching this design, send me an email- julie@knittedbliss.com.
Thanks again for buying the kit, and happy stitching!
-Julie